



Mask
The Mask node is a patch generally used to create and customize free-form solid color shapes that can be applied as a mask over other images. In a typical setup, the Mask node receives a solid color image from the Solid Color node and outputs the resulting shape mask to the Display or Canvas node, where it overlays the image received from another image source node.
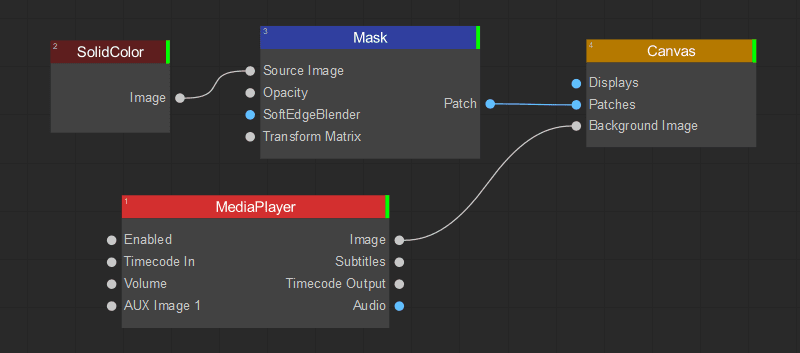
Create and customize a shape mask by performing the following actions in the Output layout area of the Patch Editor:
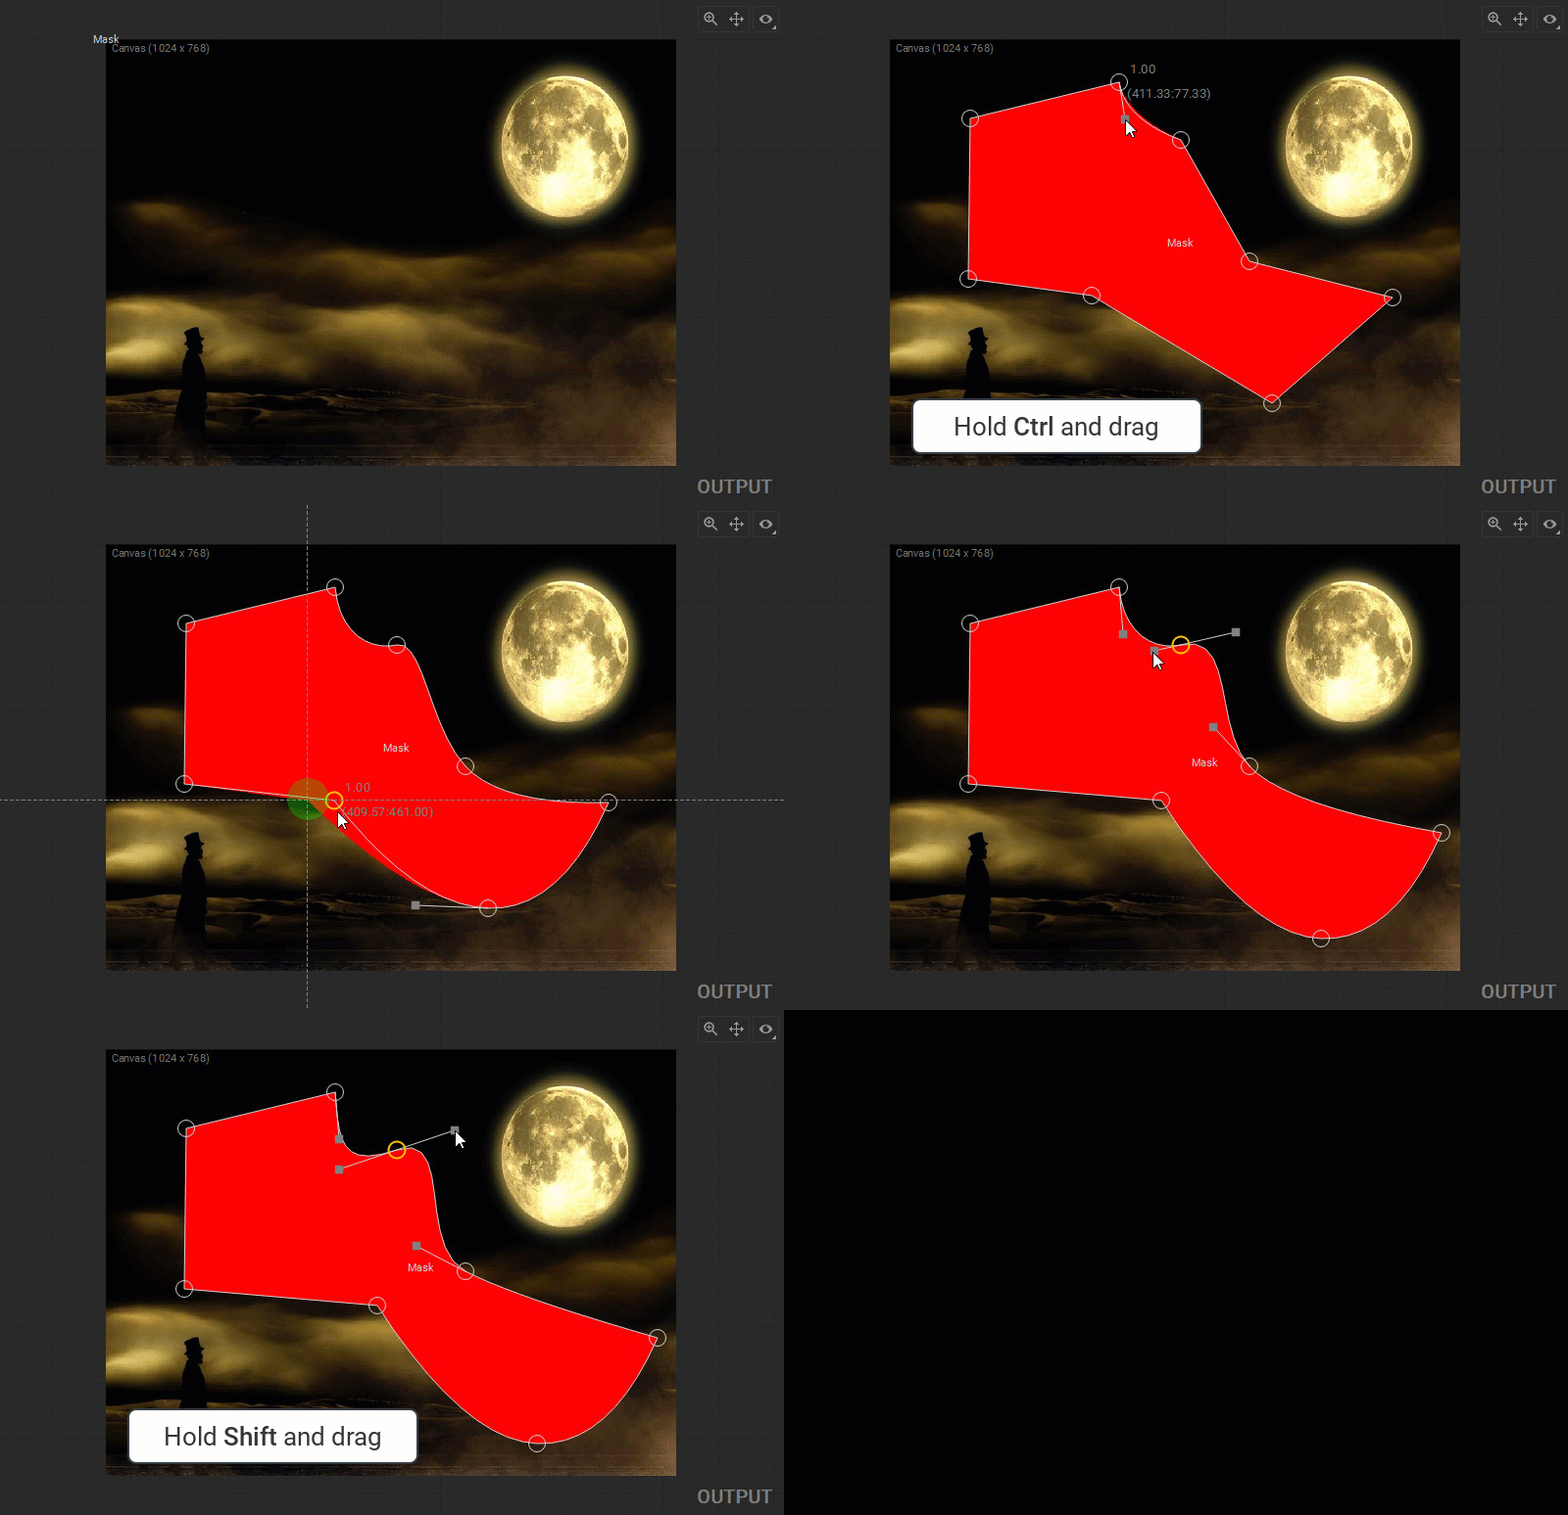
- Draw a path by adding control points. Position the cursor over the layout area and press
P, or right-click there and select Add Point from the context menu. Each new control point is connected to the previous one by a straight line. Continue adding points to form the desired shape. - Complete the shape. Double-click while the cursor is over the layout area to close the path.
- Transform straight path segments to curved ones. While hovering over a control point, do one of the following:
- Hold
Ctrland drag the mouse to extend a direction line (or tangent) handle and adjust the curve on one side of the control point. - Hold
Ctrl+Shiftand drag the mouse to extend paired direction line handles and adjust the curve on opposite sides of the control point simultaneously.
- Hold
- Modify the shape by moving control points and direction line handles. Change the shape of a path by dragging its control points, and the direction line handles. If you select more than one control point, you can drag them simultaneously. Additionally, you can set the position of a control point by selecting it and pressing the
Enterkey, or right-clicking on the control point and selecting Set Position from the context menu, then entering X and Y coordinates in the opened dialog window. When dragging direction line handles, holdShiftto adjust the curve on opposite sides of the control point simultaneously. - Create additional control points on the path. Hold
Altand click on the path to add a control point. - Delete control points. Select the control points and press
Del, or right-click the selection and choose Delete Points from the context menu.
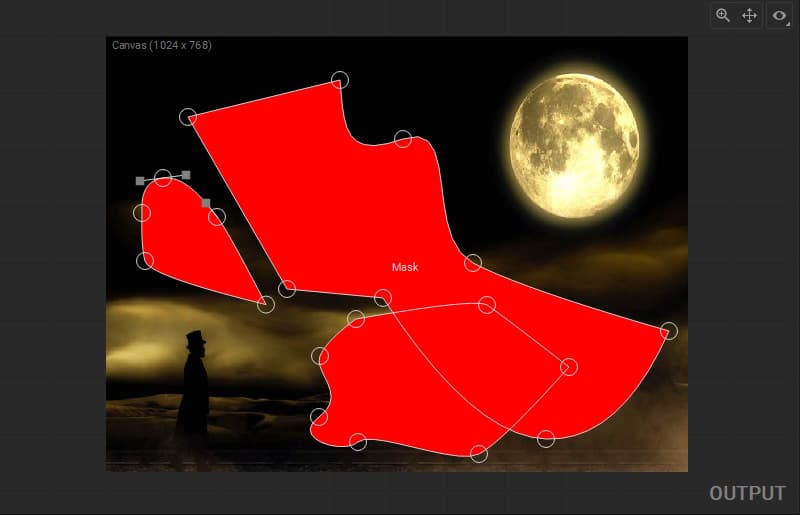
A shape mask can contain more than one shape. There can be an overlap between these shapes.
In addition, working with the Mask patch follows the general principles for working with patches outlined in the Editing Patches section of the documentation.
Last updated on