


Triangle Mesh
The Triangle Mesh node is a patch that is mostly used to map projection onto the surfaces of objects that are composed of triangular shapes.
In a typical setup, the Triangle Mesh node receives a source image as the input and outputs the modified image to the Display or Canvas node.
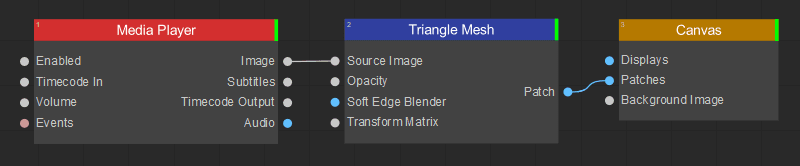
To apply triangular mesh warping:
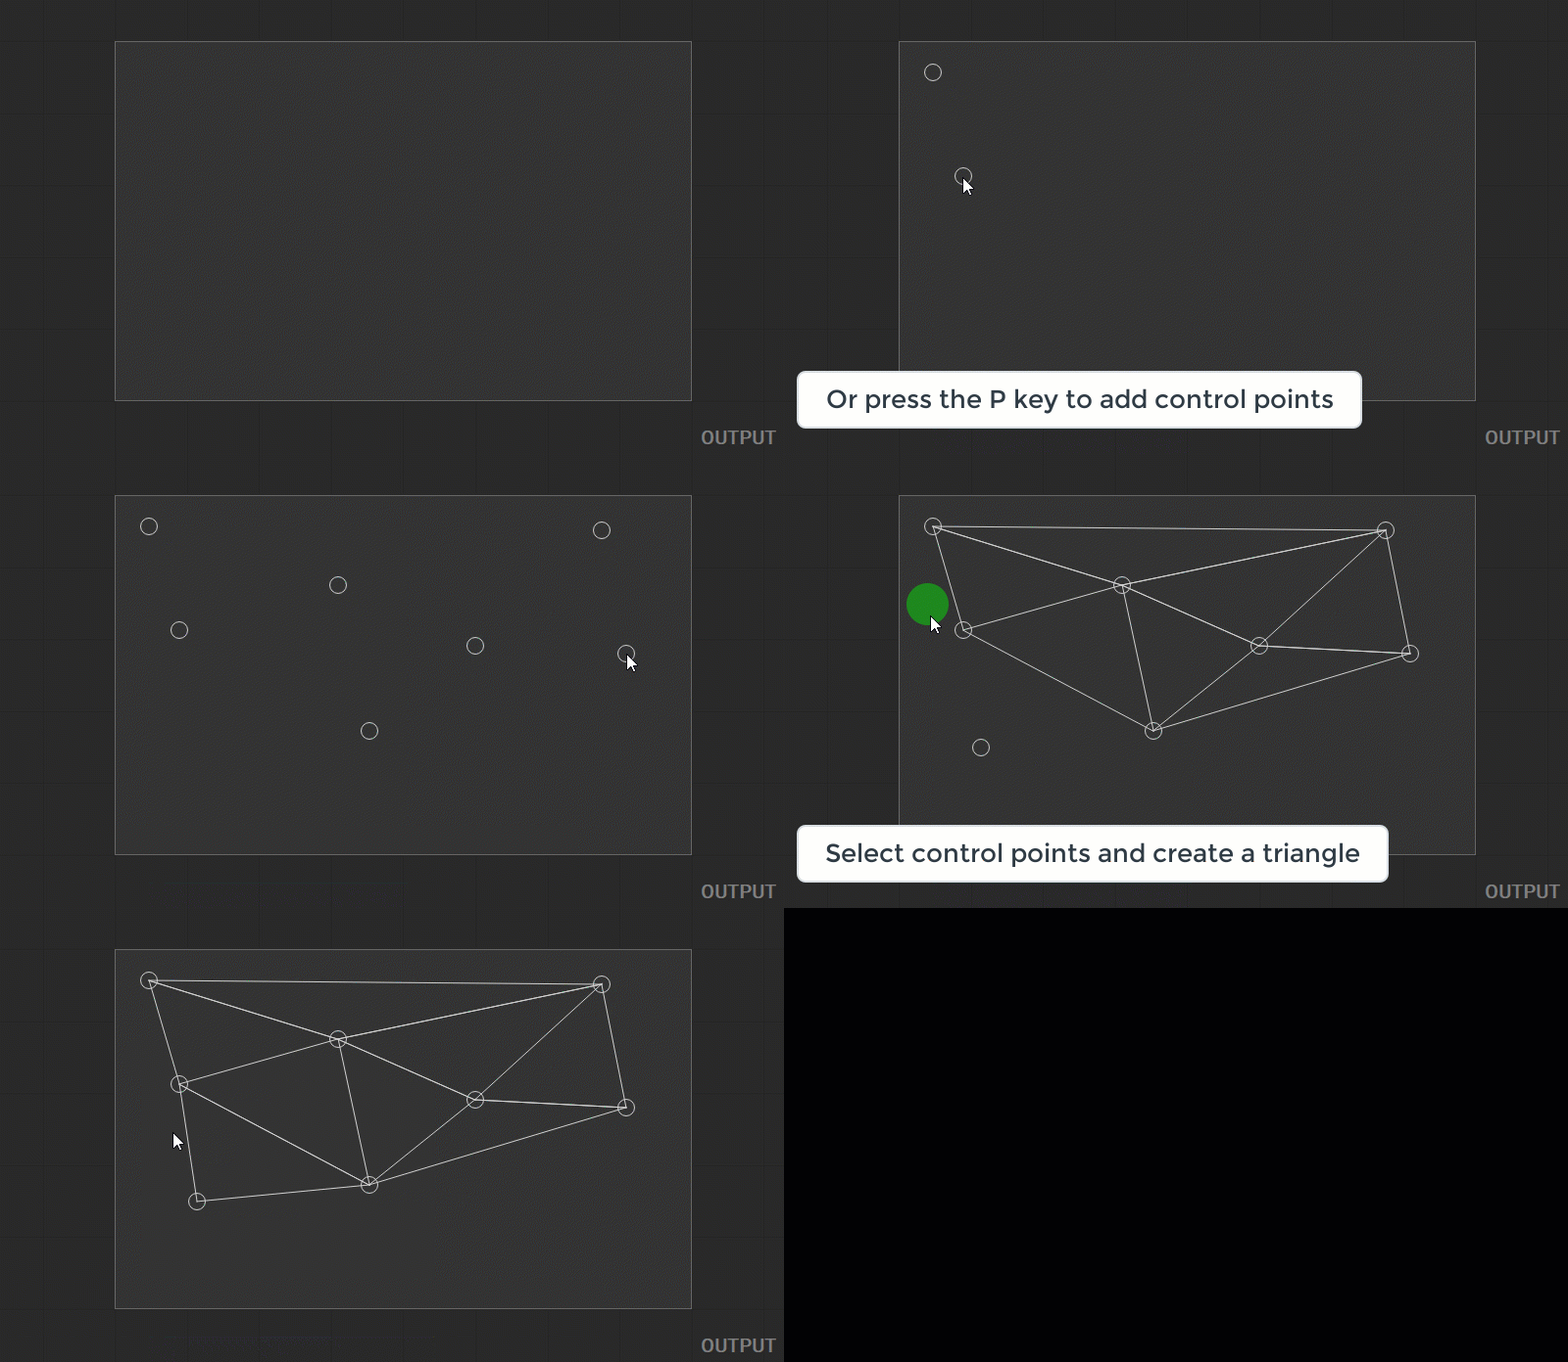
- Create and edit a triangular mesh by doing the following:
- Add control points. Position the cursor over the layout area and press
P, or right-click there and select Add Point from the context menu. - Connect control points into triangular mesh faces. Select the control points and press
T, or right-click the selection and choose Create Triangles from the context menu. If no points are selected, pressingTconnects all existing control points. - Delete control points. Select the control points and press
Del, or right-click the selection and choose Delete Points from the context menu.
- Add control points. Position the cursor over the layout area and press
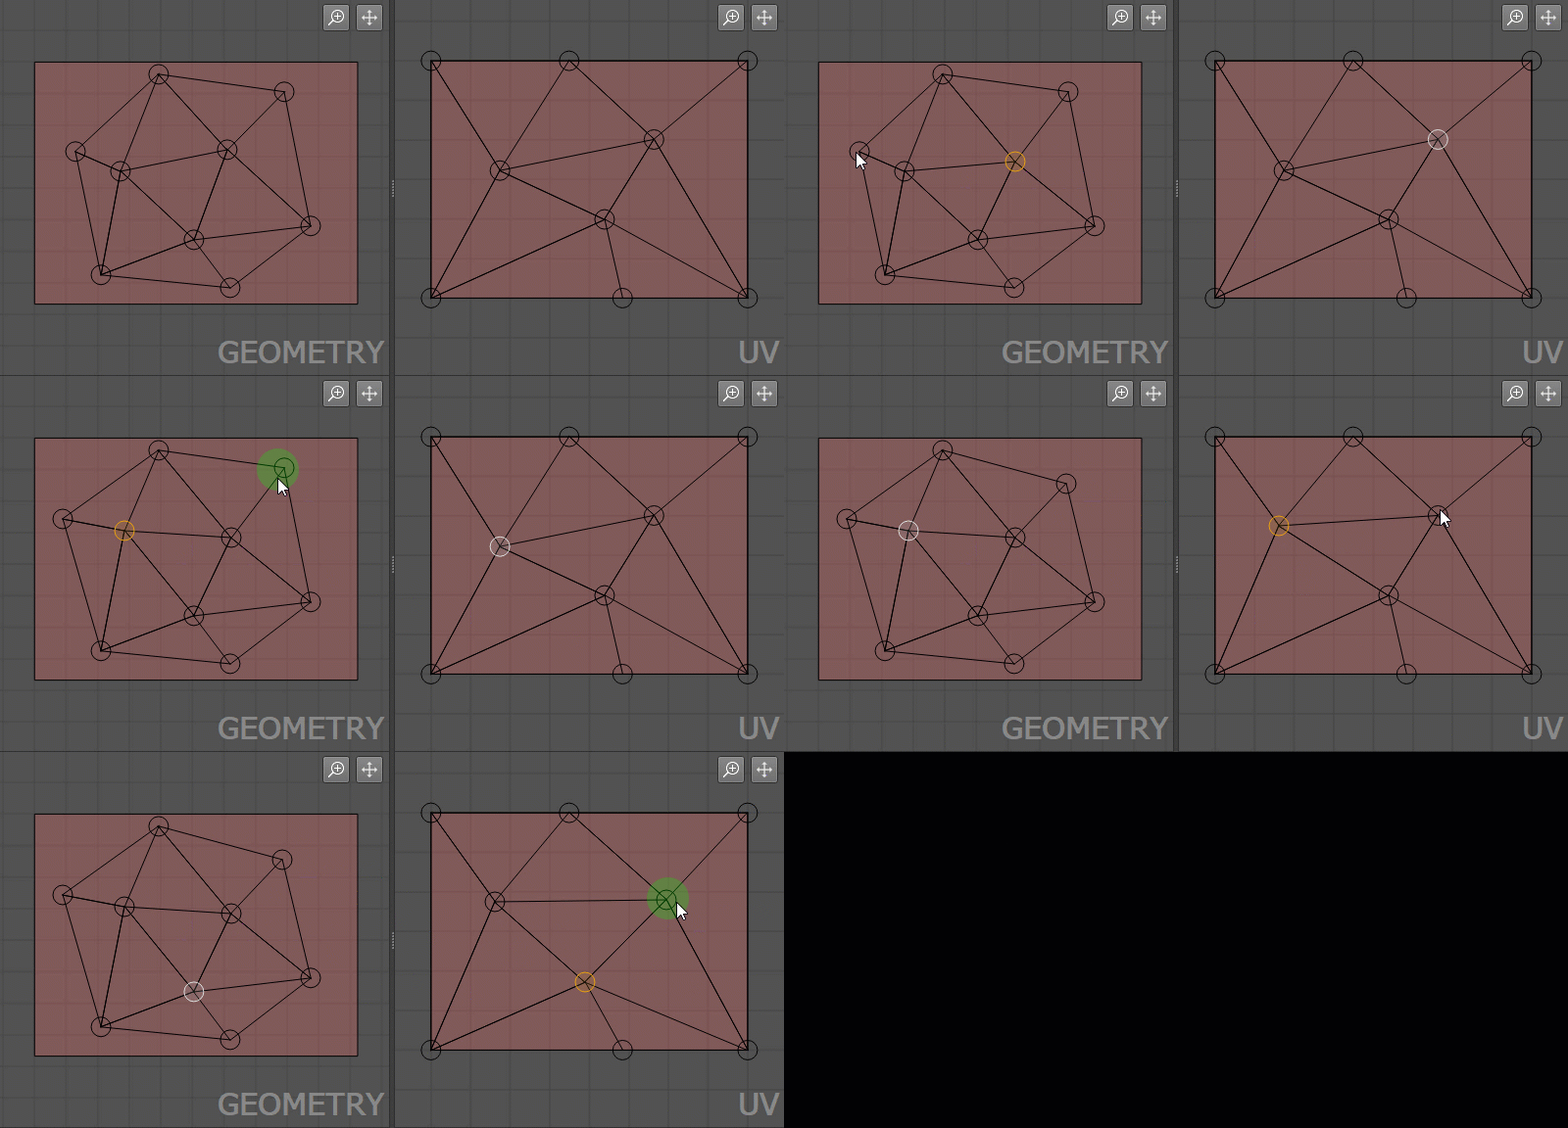
- In the Output panel, modify the mesh grid by dragging the handles of the mesh control points.
- In the Input panel, define the mapping of the source image for the individual mesh triangles by dragging the handles of the mesh control points.
In addition, working with the Triangle Mesh patch follows the general principles for working with patches outlined in the Editing Patches section of the documentation.
Last updated on