

Setting Up Calibration Camera
Equipment required for the single-camera automatic calibration:
- Digital Camera (see the list of the supported cameras),
- Tripod with a Ball Head,
- USB Cable of a sufficient length for connecting the Camera to the Screenberry Server,
- Data Interface USB Cable compatible with the camera,
- Memory Card compatible with the camera.
List of Supported Cameras for Windows
| Nikon | D33, D3s, D3x, D300, D300S, D3500, D3400, D3300, D3200, D3100, D3000, D4, D40, D5, D500, D5600, D5500, D5300, D5200, D5100, D5000, D60, D600, D610, D700, D750, D7500, D7200, D7100, D7000, D80, D810, D810A, D800, D800E, D850, D90, Df, Z50, Z6, Z7 |
| Canon | EOS-1D Mark III, EOS-1D Mark IV, EOS-1D X Mark II, EOS 100D, EOS 1000D, EOS 1100D, EOS 1200D, EOS 1300D, EOS 200D, EOS 2000D, EOS 40D, EOS 450D, EOS 4000D, EOS 5D Mark II, EOS 5D Mark III, EOS 5D Mark IV, EOS 50D, EOS 500D, EOS 550D, EOS 6D, EOS 6D Mark II, EOS 60D, EOS 600D, EOS 7D, EOS 70D, EOS 77D, EOS 700D, EOS 760D, EOS 80D, EOS 800D, EOS 90D, EOS M, EOS M50, EOS M5, EOS M6, EOS M6 Mark II, EOS M100, EOS M200, Rebel T3, Rebel T5, Rebel T6, EOS R, EOS RP, PowerShot SX70 HS, PowerShot G5 X Mark II, PowerShot G7 X Mark III |
| Sony | α7, α7 II, α7R, α7R II, α7S, α5000, α5100, αv6000, α6300, α6500, NEX-5R, NEX-5T, NEX-6, HX60, HX80, HX90, HX400, WX500, RX10 II, RX100 III, RX100 IV, RX100 V, FDR-X3000R, FDR-X1000V, HDR-AS50, HDR-AS300R, DSC-QX30, DSC-QX100 |
The camera models highlighted in bold are the ones that have been tested and recommended for automatic calibration.
List of Supported Cameras for Linux (opens in a new tab)
Selecting a Camera Lens
It is recommended to use a lens with a focal length suitable for the projection screen topology:
- Normal or Wide-angle lenses are used for planar projection surfaces which are usually rectangular.
- Normal or Wide-angle lenses are used for non-planar projection surfaces such as a curved rectangular display.
- Circular Fisheye lenses are used for non-planar projection surfaces such as a dome or cylindrical panorama.
Camera Settings
It is important that camera post-processing parameters are switched off.
Example of correct Nikon camera* settings:
| Set Picture Control | SD (Standard). All parameters should be set to zero, including sharpening. |
| Active D-Lightning | OFF |
| High ISO NR | OFF |
| Auto Distortion Control | OFF |
| Long Exposure NR | OFF |
| Automatic focus | OFF |
| Auto Sensitivity Control | OFF (Nikon 3400 only) |
| White Balance | Cloudy |
If the camera prompts you to enter the date and time after being turned on, press the OK button.
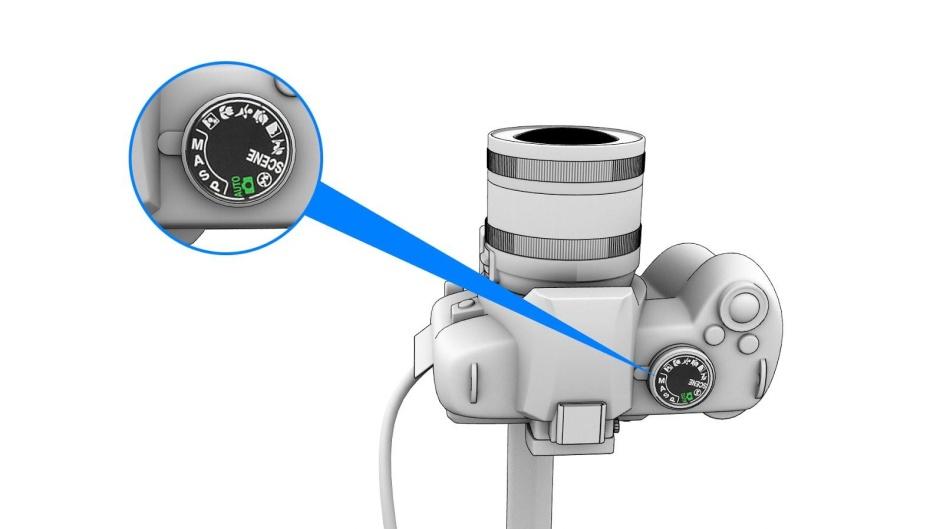
Set the camera mode dial to Manual (M).
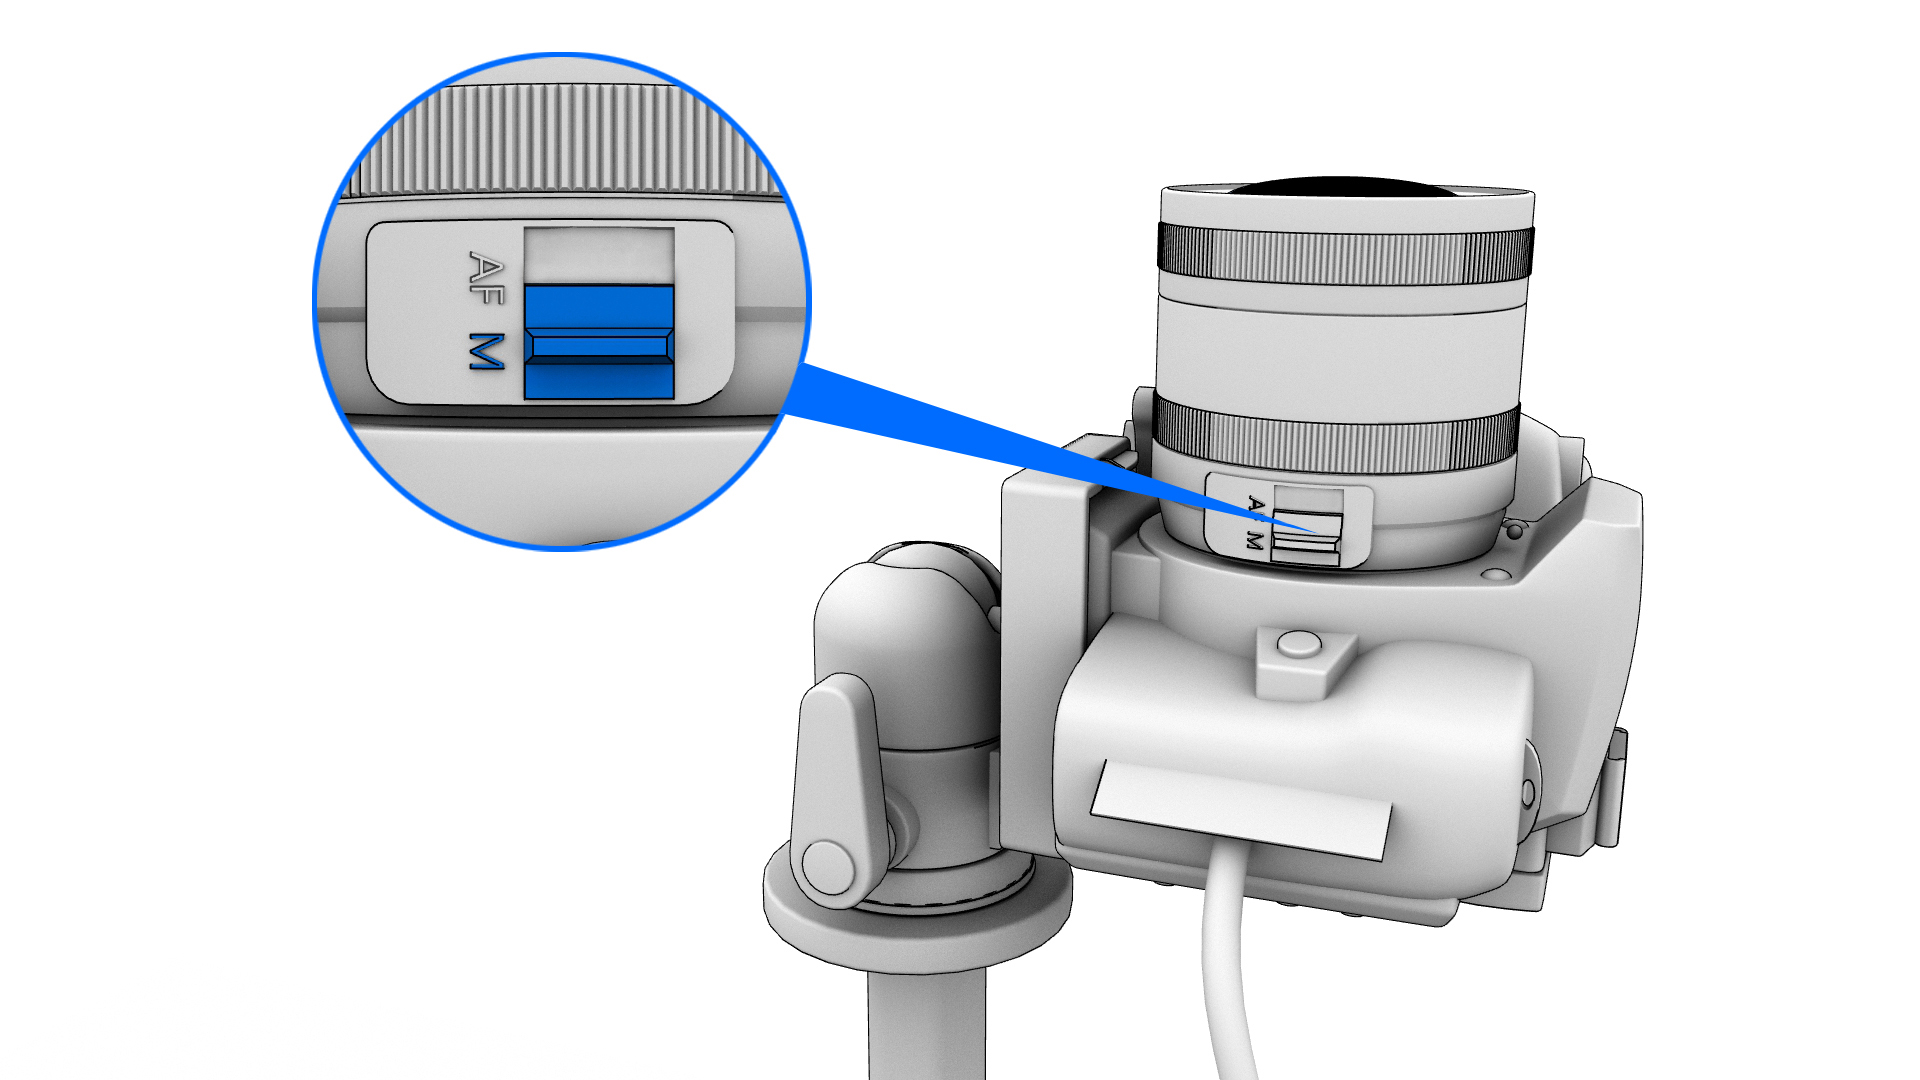
Switch the lens focus to Manual (M) and focus the lens manually using the Focus Grid test pattern of the Calibration Wizard as a reference.
Positioning the Camera
Camera position guidelines:
- Mount the camera steadily on a tripod and position it in a way that it captures the entire projection area (screen).
- Position the camera tripod on the floor surface below the dome so the camera lens is aligned with the dome’s zenith.
- Ensure that the camera tilt matches the dome tilt.
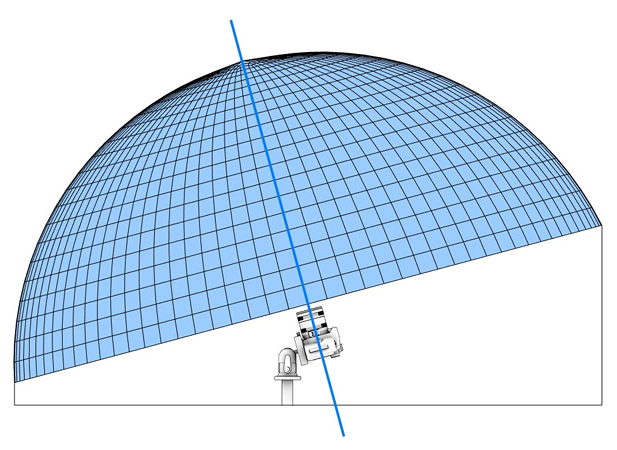 | 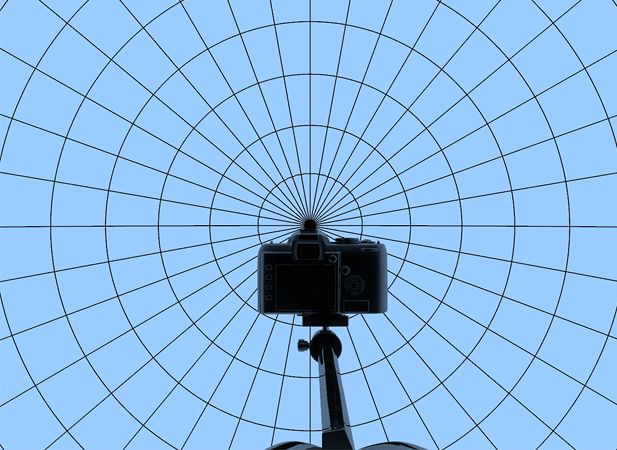 |
|---|---|
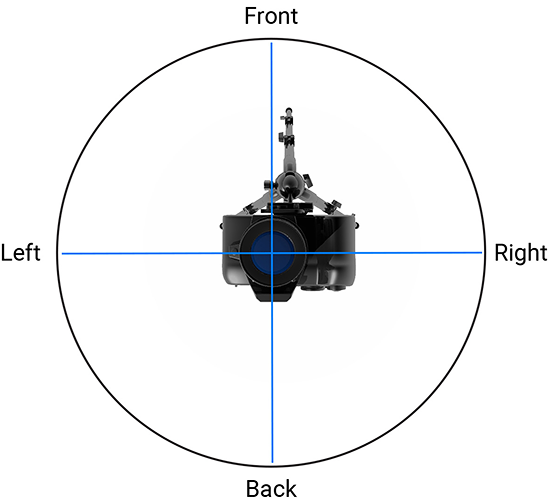
| Camera position. Side view. | Camera position. Zenith view. |
- Position the camera lens directly below the projectors’ lenses so that the camera does not cast shadows on the dome screen.
- Orient the camera so that the bottom of the picture frame corresponds to the front of the dome and the top of the frame corresponds to the rear end of the dome.
Note: The camera tripod should be installed on a firm and stable horizontal surface to avoid movements and vibrations during the calibration process.
After positioning the camera:
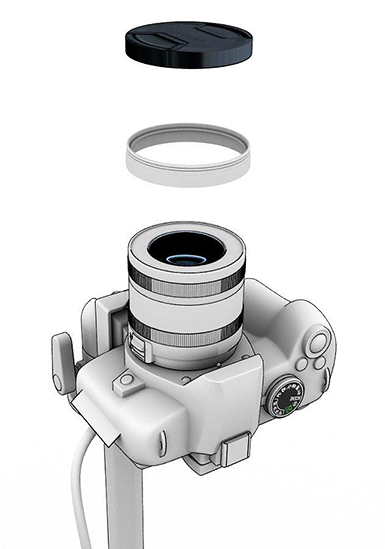
-
Remove the lens cap and anti-glare ring.
-
Connect the camera to the Screenberry Server using a USB cable.
-
Ensure that the camera memory card has sufficient free space for at least one photo in the RAW format.
-
Ensure that the camera battery is sufficiently charged. In the case of using a power adapter, connect the camera to a power outlet.
-
Ensure that there are no obstructing objects between the screen and the camera that could interfere with the calibration process.
Warning: The entire projected image should be within the camera view, and there should be no shadows on the screen.
Multiple-camera calibration
Screenberry also supports multiple-camera automatic calibration.