Creating and Managing Timelines
Overview
The Media Player widget enables you to assemble and play media items on a timeline. You can create multiple timelines and organize them in folders if necessary.
Adding Timelines
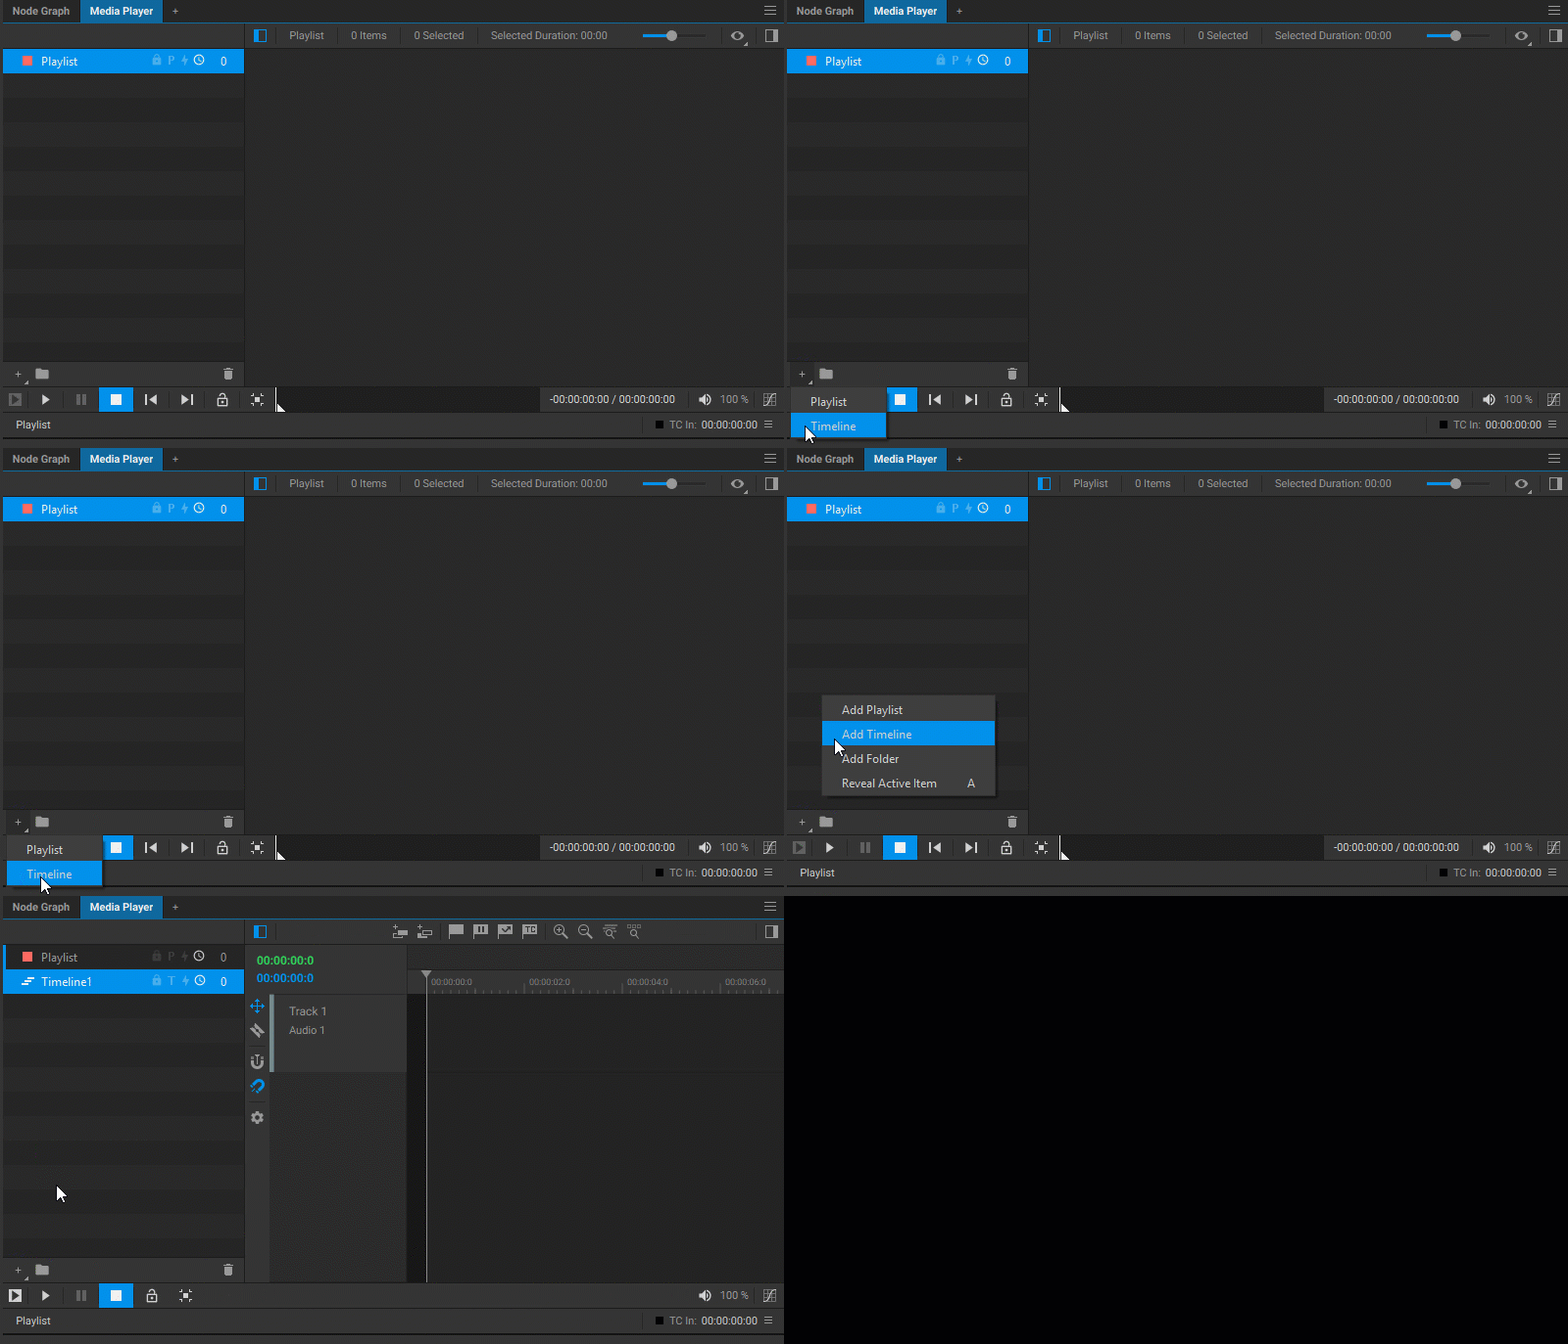
To create a new timeline, you can either right-click an empty area of the Playlist and Timeline List panel or click the Add button ![]() in the bottom toolbar, then select Add Timeline from the dropdown menu.
in the bottom toolbar, then select Add Timeline from the dropdown menu.
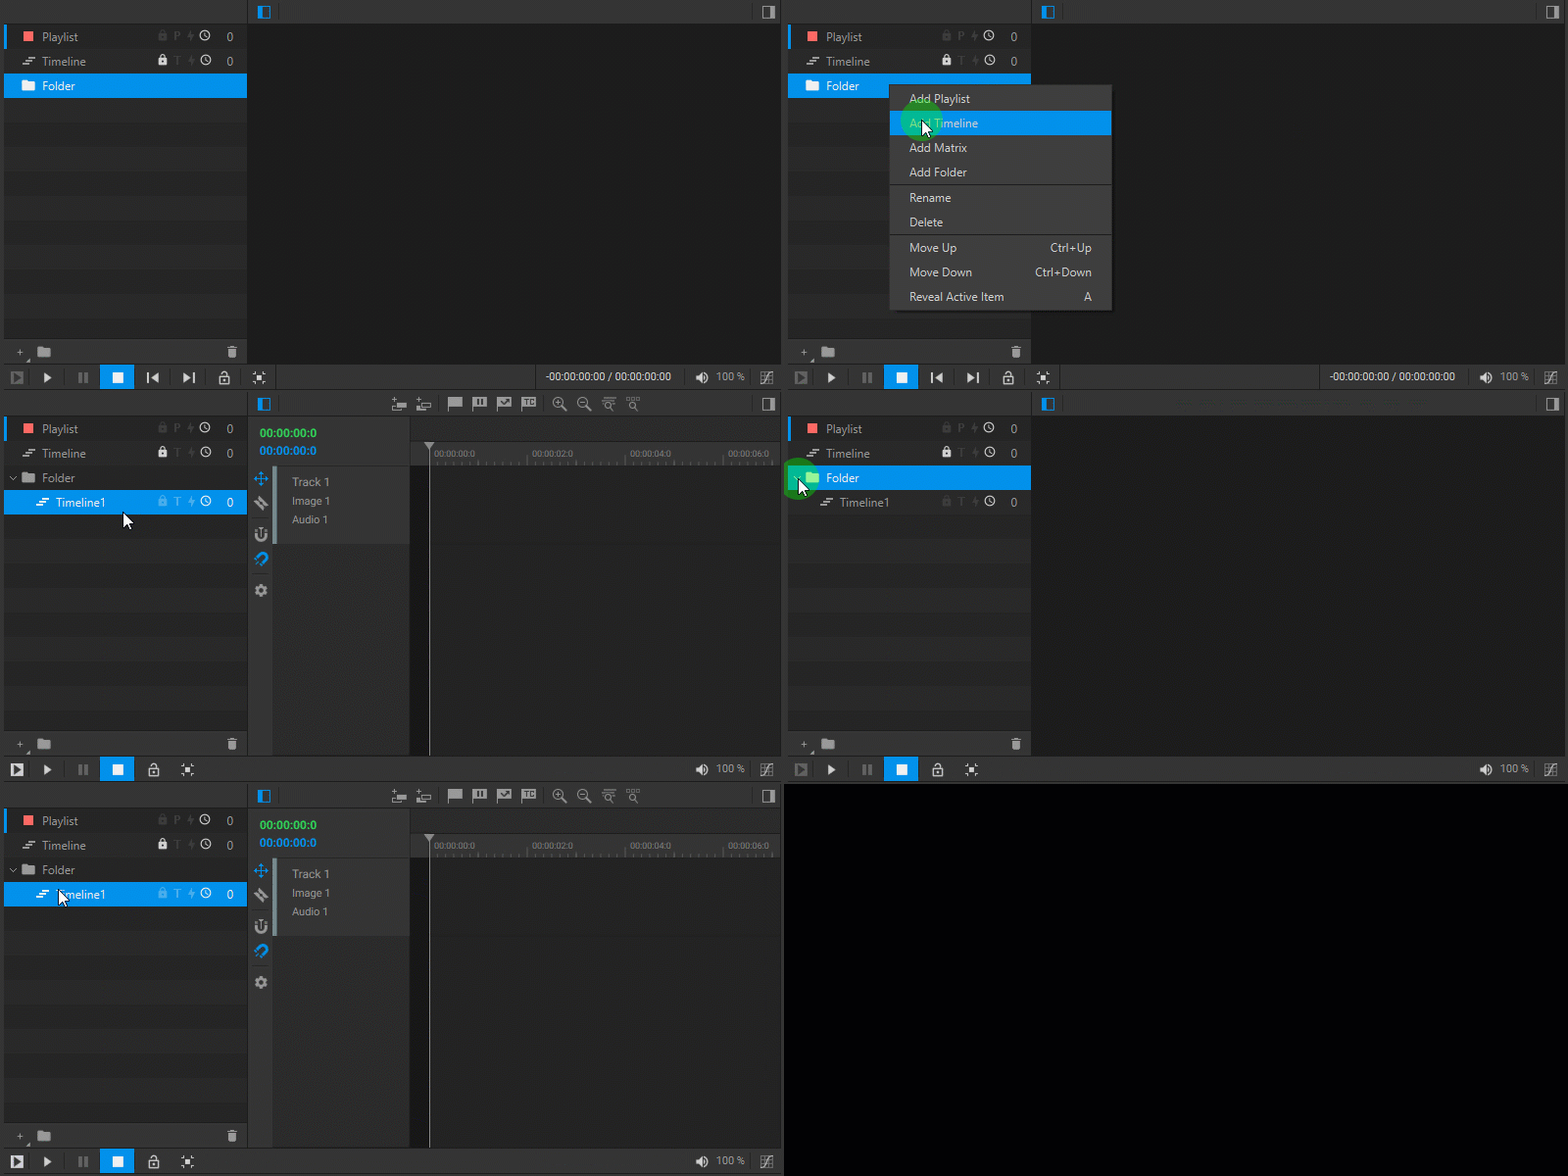
You can create a timeline within an existing folder by either right-clicking the folder or selecting it and clicking the Add button ![]() in the bottom toolbar, then choosing Add Timeline from the dropdown menu.
in the bottom toolbar, then choosing Add Timeline from the dropdown menu.
To show or hide the contents of a folder, click the arrow icon located next to the folder icon ![]() .
.
Renaming Timelines
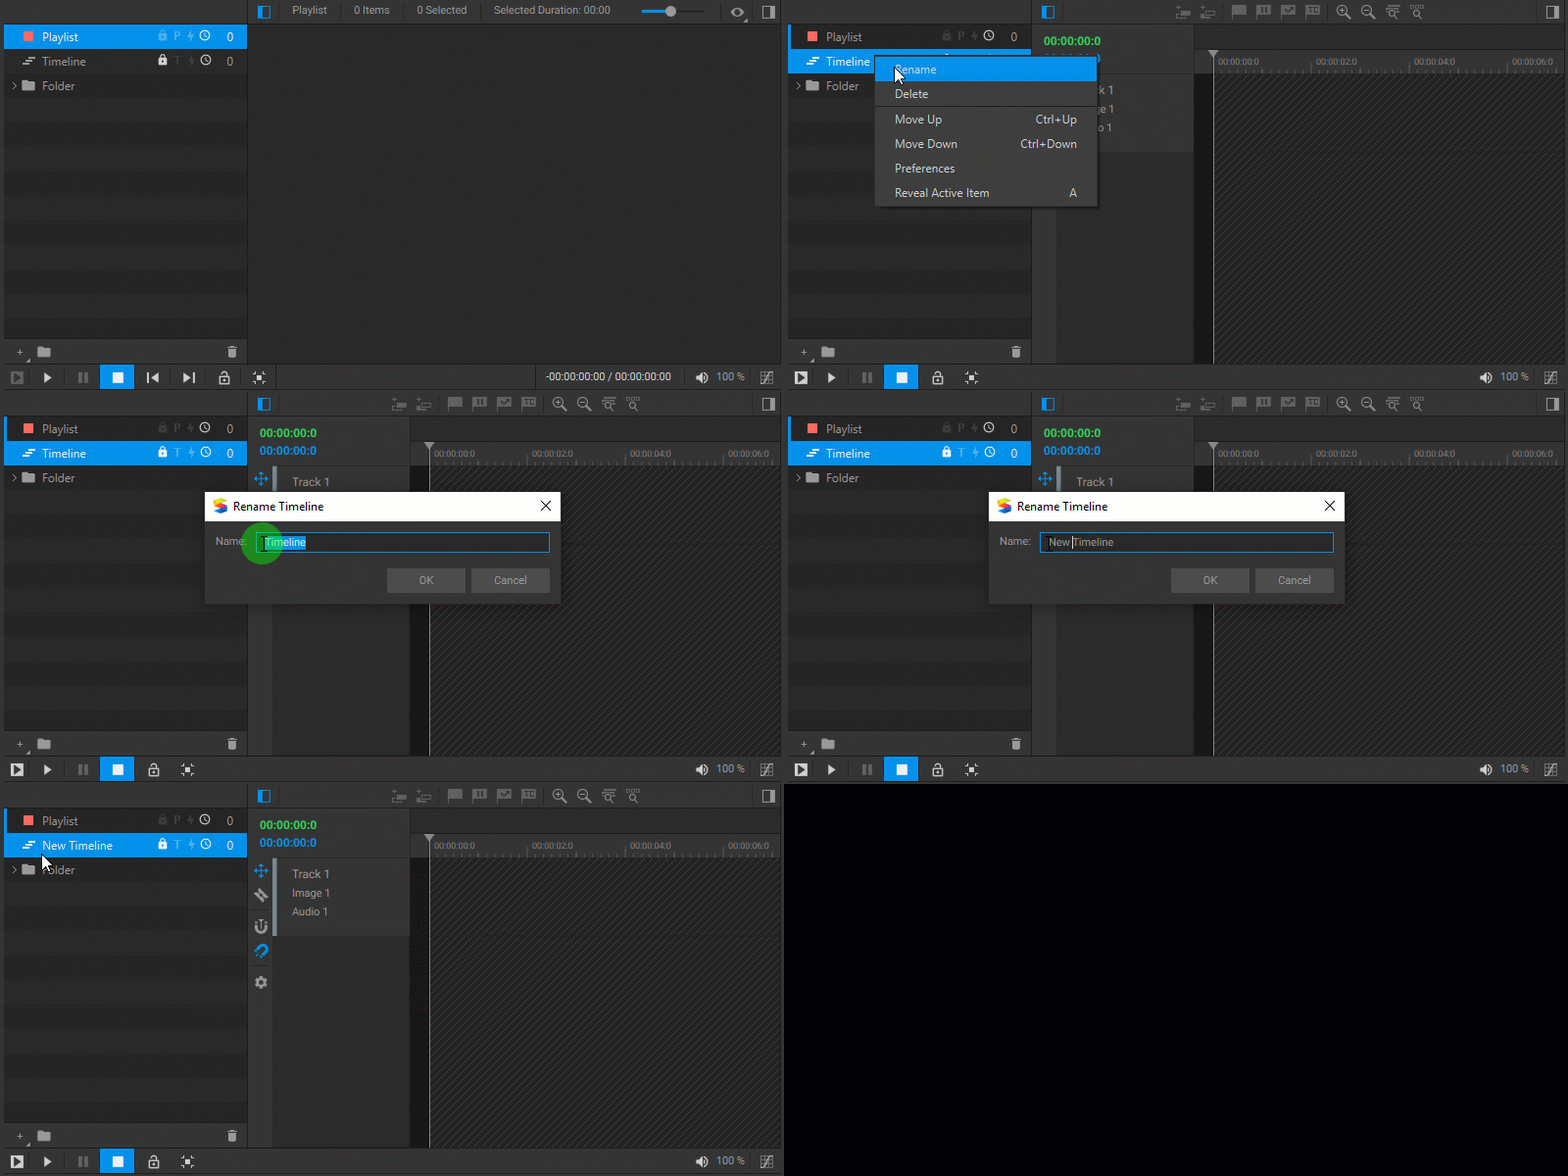
When you create timelines, it’s beneficial to name them descriptively so that they can be easily identified. To rename a timeline, right-click on its name, choose Rename from the dropdown menu, and enter a new name in the opened dialog box.
Deleting Timelines
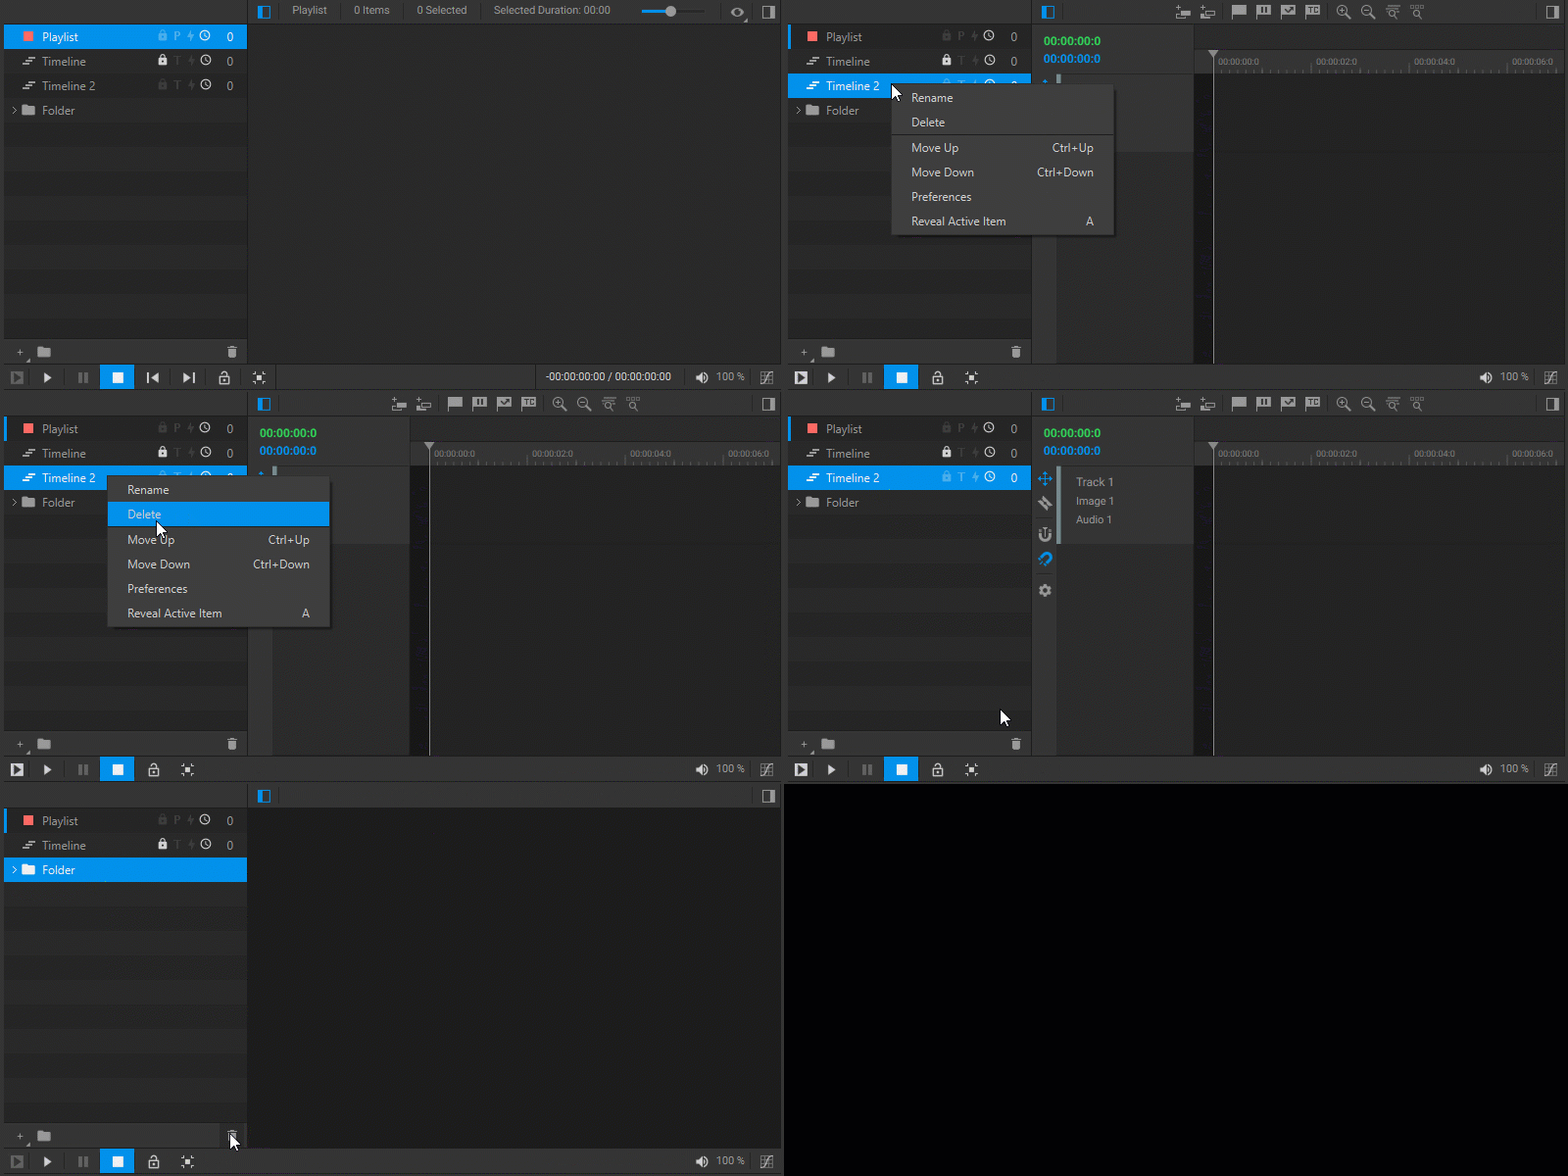
To delete a timeline, either right-click on its name and select Delete from the dropdown menu, or select it and click the Delete button ![]() in the bottom toolbar of the Playlist and Timeline List panel.
in the bottom toolbar of the Playlist and Timeline List panel.
Arranging Timelines
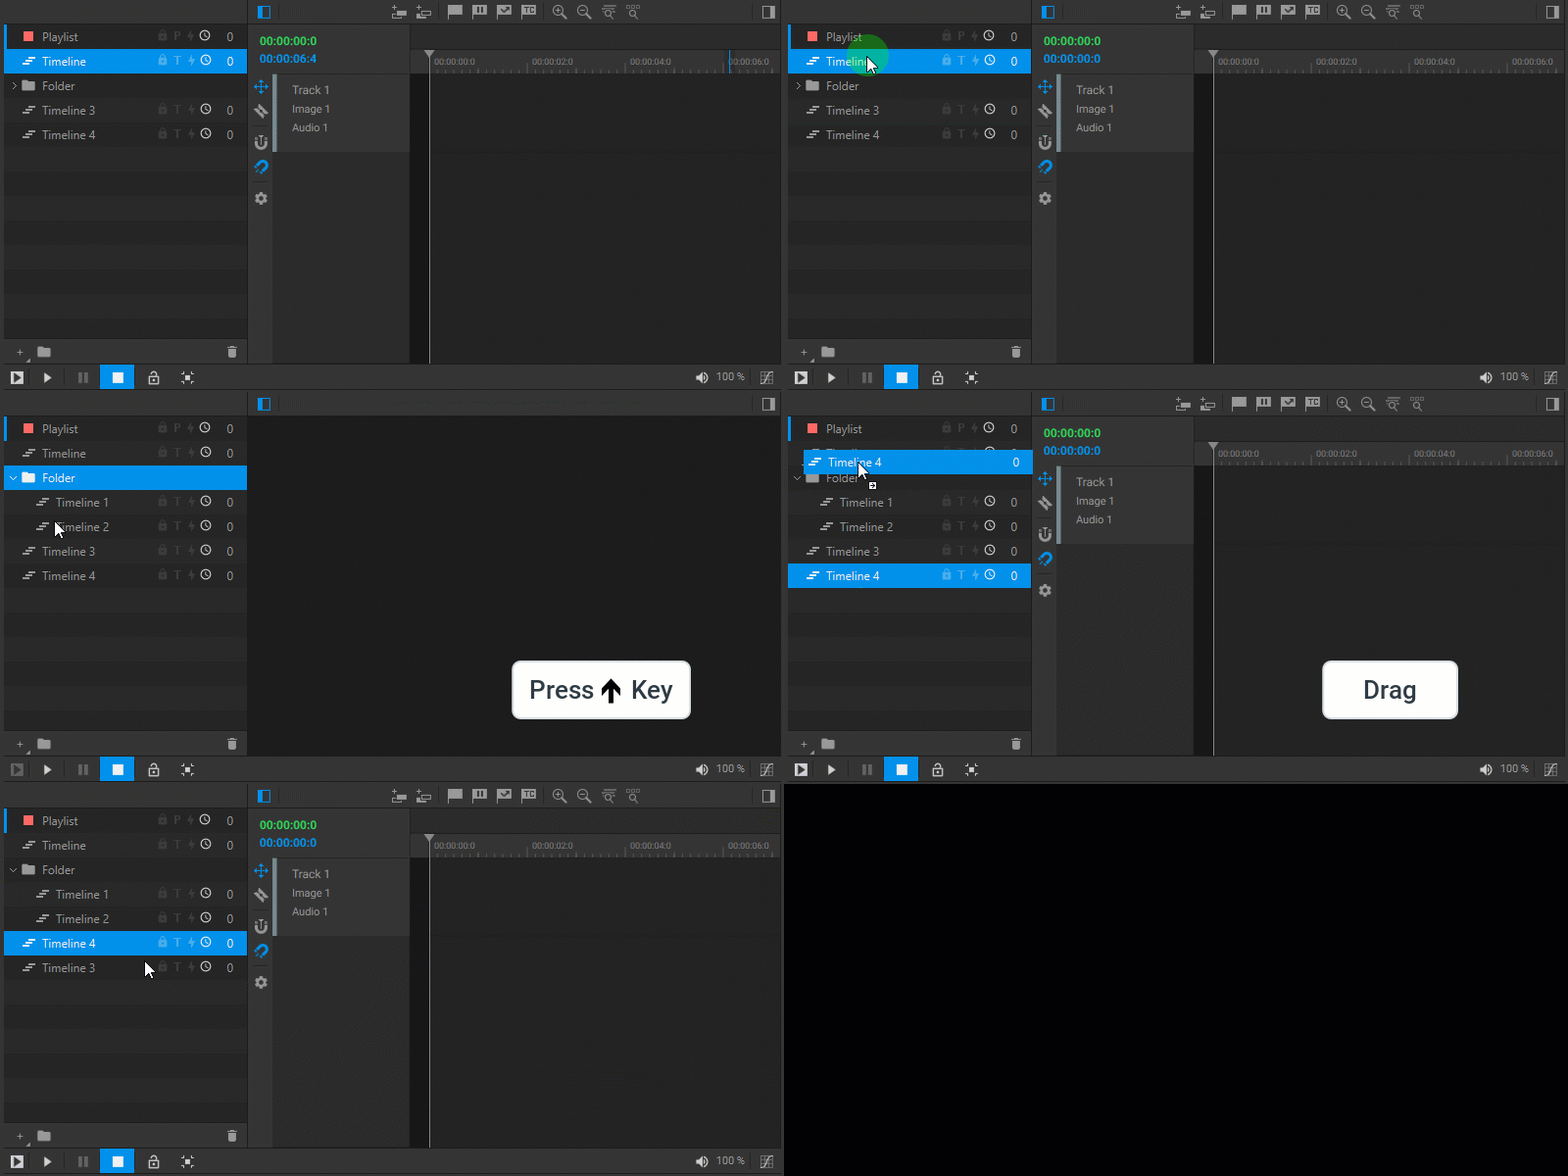
You can navigate the Playlist and Timeline List using the Up and Down arrow keys or by selecting timelines directly with a mouse click. To expand or collapse the contents of a folder, click on the arrow icon located next to the folder name.
To change the order of playlists, timelines, or folders, either right-click on one of their names and select Move Up (Ctrl + Up) or Move Down (Ctrl + Down) from the dropdown menu, or drag and drop it within the list. You can move a timeline into a folder by dragging it over the name of the folder or its contents.
Timeline Settings and Indication

The toggles for the timeline settings are located next to the timeline name in the Playlist and Timeline List panel. These toggles also serve as indicators of the current timeline’s state.
- Locking. To prevent unintentional changes from being made to a timeline, it can be locked. When locked, a timeline cannot be modified further, whereas an unlocked timeline can be edited.
- Sending the Timecode. Enabling or disabling this toggle controls whether the timeline sends out a timecode or not.
- Event Mapping. Media items within a timeline can be mapped to different events, such as MIDI/Keyboard events, to trigger playback. This toggle allows you to switch the timeline’s state between listening to these events and ignoring them. For more information, please refer to the Mapping Media Item to Event section.
- Listening to the Timecode. By enabling or disabling this toggle, you can switch the state of a timeline between listening to the timecode and ignoring it.
- Number of Media Items displays the current count of media items that have been added to the timeline.
Playback Indication

The indicators located next to the timeline name show whether the timeline is currently playing, paused, or stopped. In cases where the timeline is contained within a collapsed folder, these indicators replace the folder icon.
Frame Rate (FPS)
To modify the frame rate of a timeline, right-click on the timeline name and choose Preferences from the dropdown menu, or click on the gear icon in the timeline’s side toolbar, then, in the opened Timeline Preferences window, select the desired frame rate value from the Timeline FPS drop-down list.
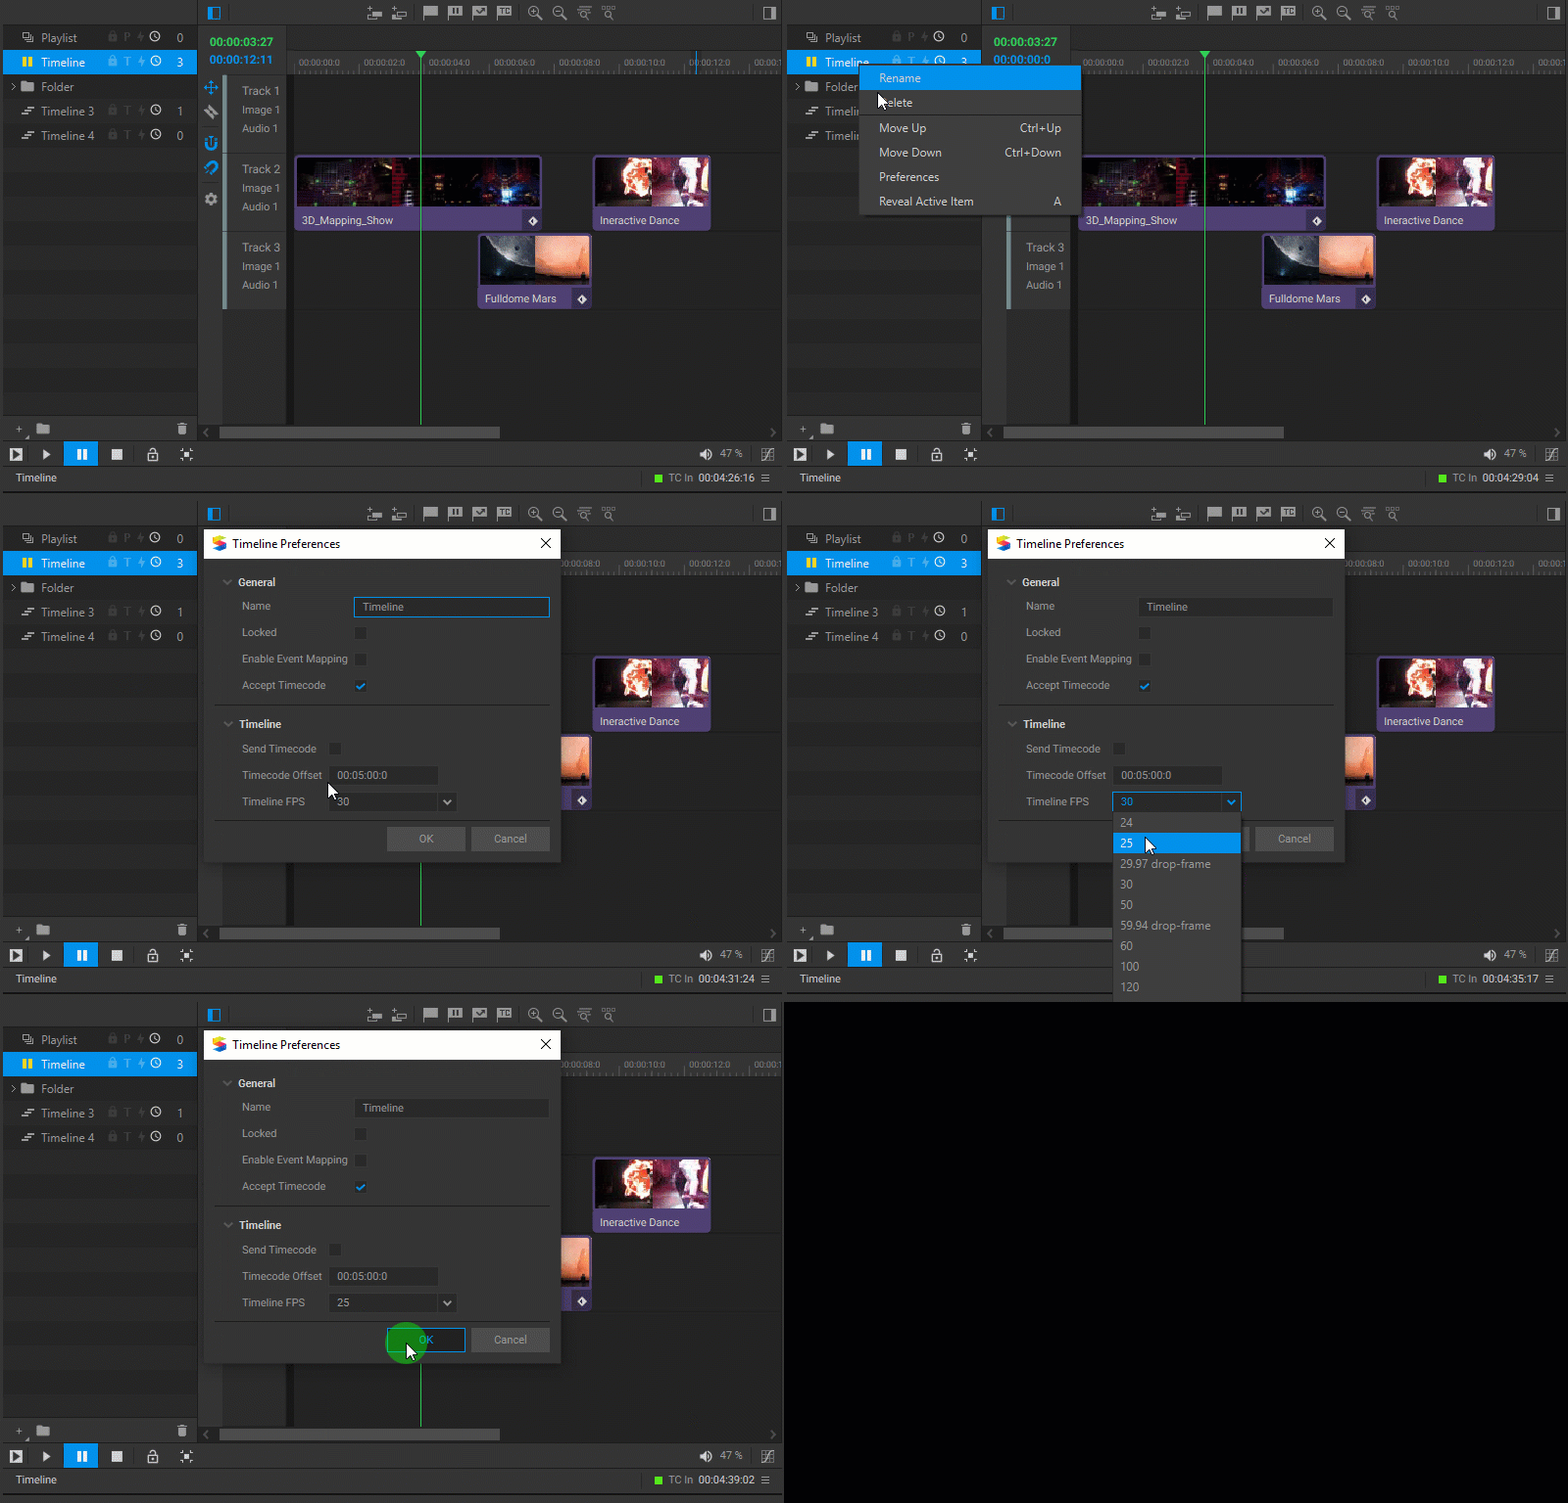
Note: The toggle settings described above can also be adjusted in the timeline preferences, which can be accessed by right-clicking on the timeline name and selecting Preferences from the dropdown menu.

